Distributing private project with Cocoapod and Carthage in 5 minutes
Learn how to use deploy private project with Cocoapod
Last week I have a problem while making a pod for my SDK team. I ever made my own pod long time ago and it was very easy in the process. But this one was a different story. I need to make support of Cocoapod and Carthage and SPM for the project that is built within private repo but we want to distribute it globally. So what is the option? Pod and Carthage and SPM offer capabilities to share the project repo to being used widely by many people and they can easily integrate or even contribute to it. However how about a private repo project like an SDK? There is one solution we can use, distribute only the compiled binary source of the framework. So let’s start to make it! Follow these steps below:
- Make one public repository on Github only for the binary framework we want to distribute
- Put the binary framework there
Yup, that’s it ~ well wait !~. We still need to do some process to make it being acknowledged by both Carthage and Pod.
COCOAPOD
For Cocoapod there are some steps that need to be done first make a new YourProductName.podspec file and write it like this
Pod::Spec.new do |s|
s.name         = "YourProductName"
s.version      = "3.2.6" // Change with your version
s.summary      = "Brief summary."                           s.description  = <<-DESC Your description.                         DESC
s.homepage     = "Your website"
s.license = { :type => 'Copyright', :text => <<-LICENSE                                          Copyright 2020 LICENSE }
s.author       = { "$(git config user.name)" => "$(git config user.email)" }
s.source       = { :git => "https://github.com/YourRepo.git", :tag => "#{s.version}" }
s.vendored_frameworks = 'YourProduct.framework', 'YourProductA.framework'
s.platform = :ios
s.swift_version = "5"                           s.ios.deployment_target  = '9.0'
end
As you can see above you need to add this one and update it every time make a new release. For s.vendored_frameworks you can fill in as many dependencies as you have separated by commas. Later on, they just do a one-time pod command and can automatically figure out the dependencies needed. Once this one did then do this
pod repo add YourProductName https://github.com/YourRepo.git
Wait for the process above until finished, then you can add the tag of your branch to the remote branch after you add the tag then do this
pod repo push YourProductName YourProductName.podspec
Once this process is done, then your pod is ready to use!. Now navigate to other project and add this to your Podfile (you can omit the version to always fallback to latest supported version)
pod 'YourProductName', '0.0.1', :source => "https://github.com/YourRepo.git"
If you have a newer version on your tag, always do this command below every time to update the pod repo. (And update your podspec as well)
pod repo push YourProductName YourProductName.podspec
CARTHAGE
For Carthage, it is a very easy setup. Compress all of the binary that you want to share and rename it as per the name you want to use for it. Now go to the repo and place it there, however, let put our .gitignore so git won’t push it to the remote repo like below:
.DS_Store
*.zip
Then add new JSON (YourProductName.json) that contained the version and the link of the binary like below:
{
    "0.0.1": "https://github.com/YourRepo/releases/download/0.0.1/YourProductName.zip"
}
If you see the pattern above then we do still need one more step, we must make a release on our git repo. Go to the Releases and click Draft new releases. Remember you need to add the tag beforehand so they are able to search the related tag.
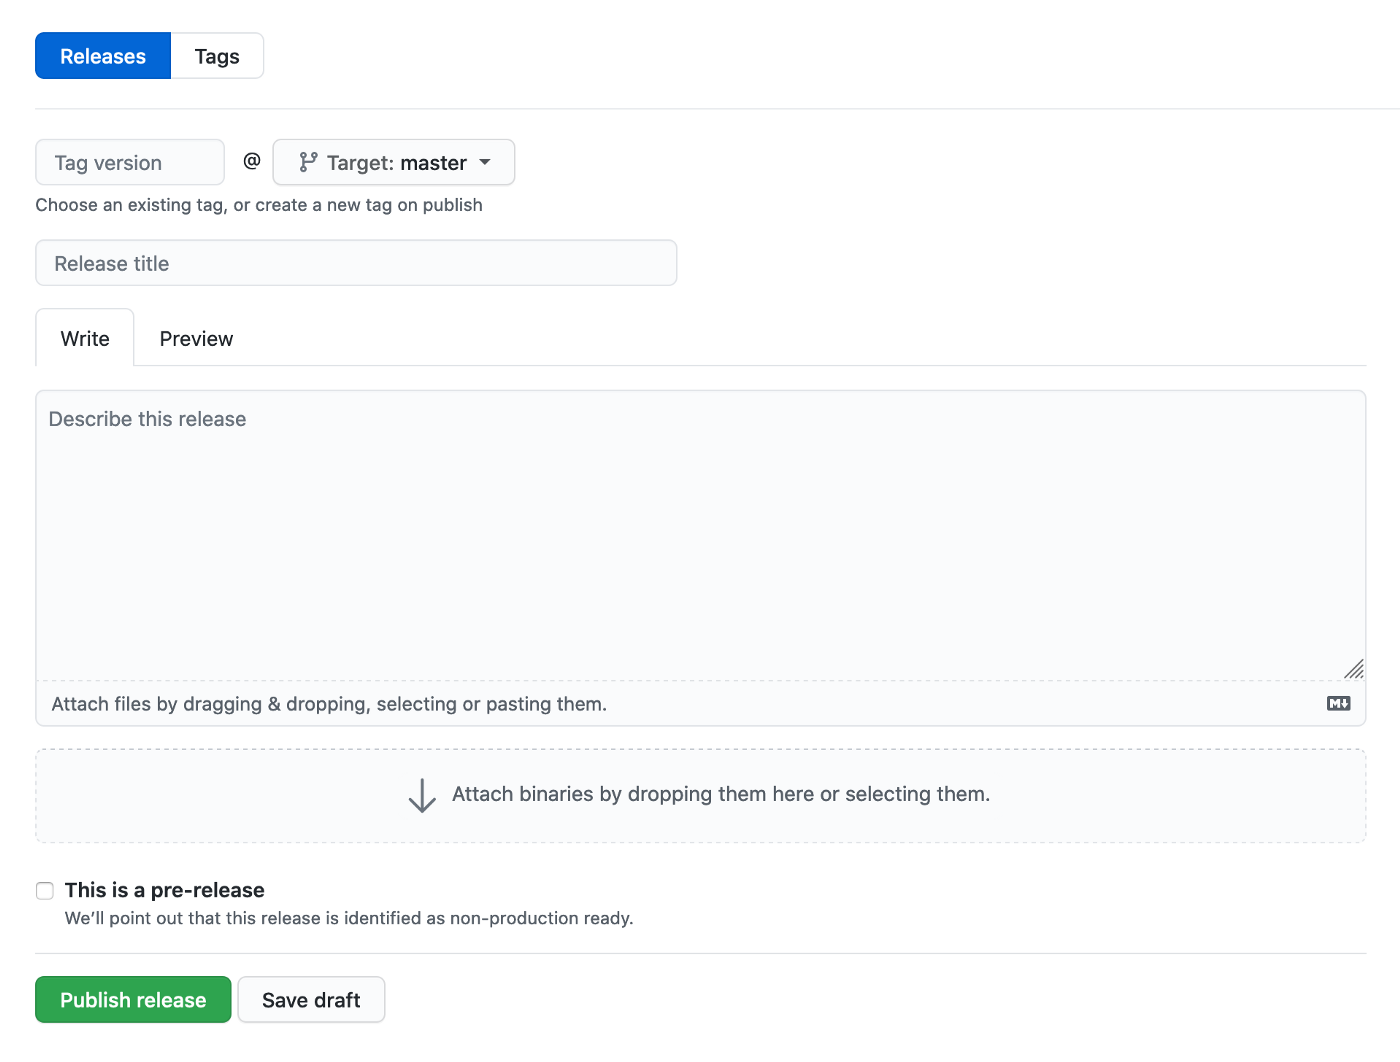
Once you go to this page, fill in all necessary information then attach the .zip and .json on the Attach binaries .... row. After that publish the release.
Once it is done now you can do this on your other project Cartfile below:
binary "https://github.com/YourRepo/releases/download/0.0.1/YourProductName.json" ~> 0.0.1
Make sure the 0.0.1 is the destination of the release version we want to use.
Finally, everything is done! Now you are able to make your binary framework public and being used by the client without exposing your private code to them! The only thing left now only SPM, once I figure it out how to make it then I will make another article for that. However there is a disadvantage for this way, we need to manually put the release every time in this public repo and carefully managing the podspec and the .zip as well .json.